前言
前天看到有同事分享了一个照片分享的相册系统,看完之后,想起我之前也是因为团建旅游回来后写了一个基于node的相册和目录浏览的系统folder-gallery,不敢私藏,开源出来给大家。因为我之前写过一个基于nw的桌面版照片浏览应用 AlexGallery ,所依赖的一些库也是差不多,所以网络版写起来比比较快。
其实这个系统,我并没有写多少代码,估计也就100多行左右,都是使用开源的库搭起来的,所以简单的说,我其实不怎么写代码,我只是github的搬运工,再简单的说,呃,其实我是个搬砖的。
我觉得,一个高效多产的coder,不但要写得一手好代码,还得要搬得一手好砖。下面我会简单介绍一下搬砖的全过程。
Demo和截图
公司内部网络Demo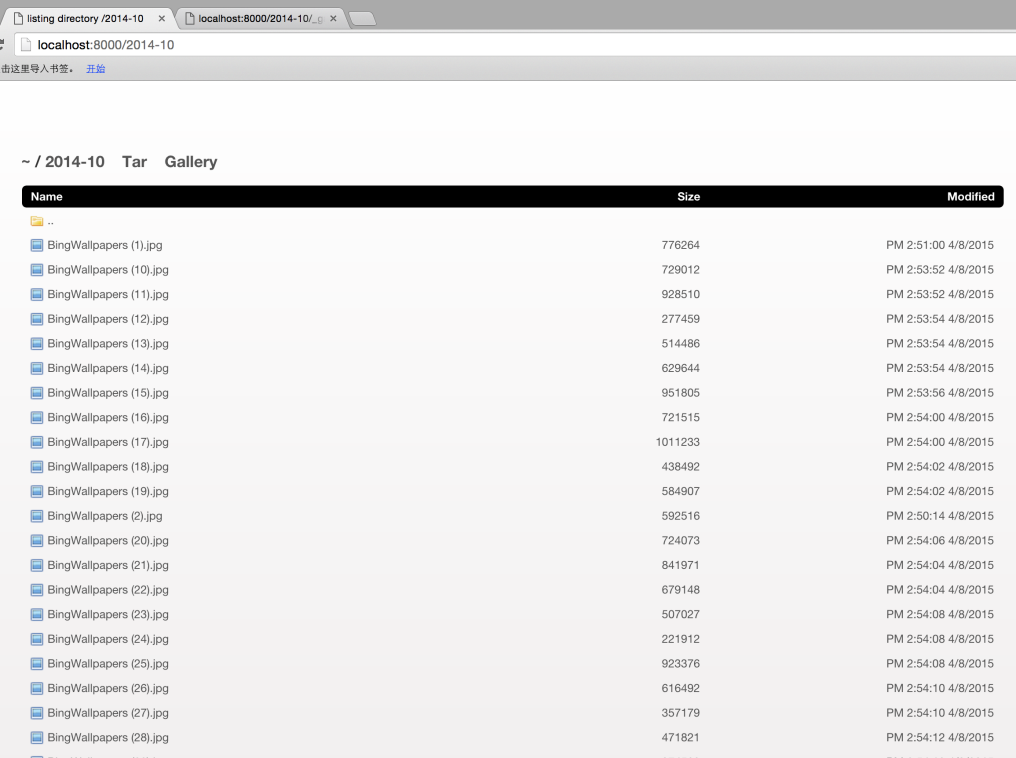
特点
folder-gallery的特点是简单、易用,包括:
- 安装部署简单,只需要一个json参数配置就可以运行并使用
- 目录浏览的方式,简单直观
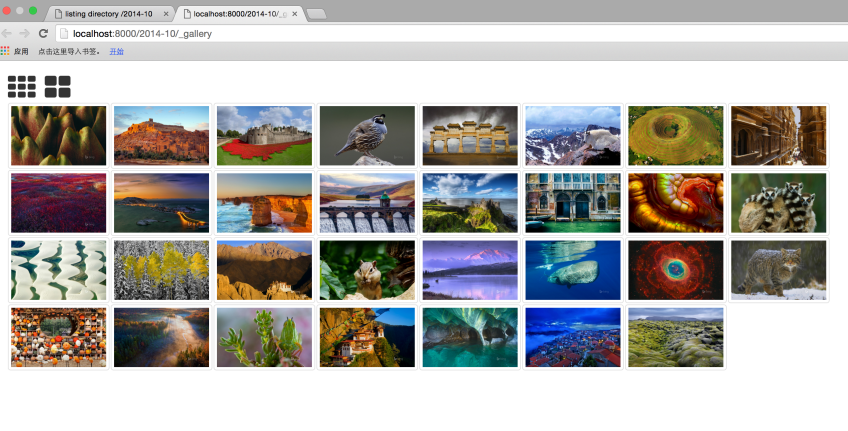
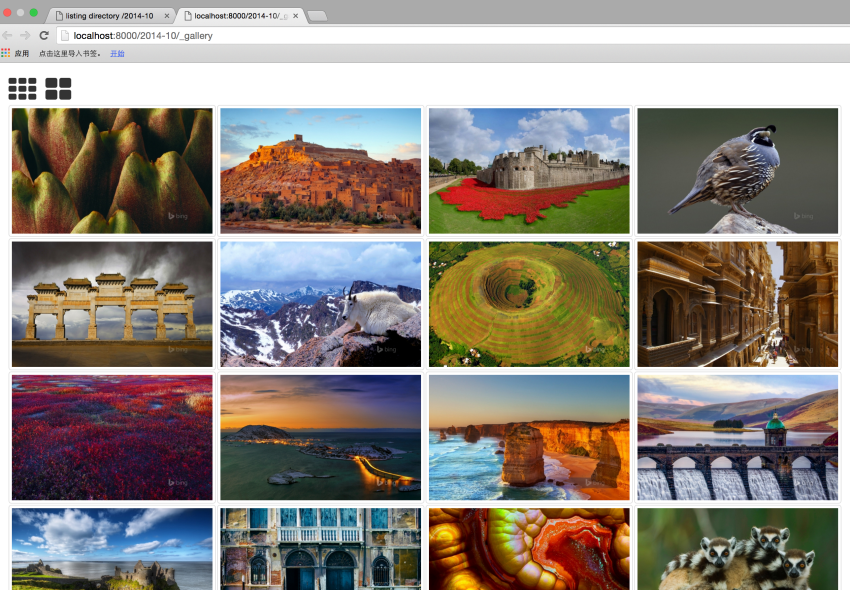
- 可以进入相册浏览方式,并提供两个尺寸的缩略图浏览方式
- 提供文件夹压缩下载功能
安装方式
- 依赖bower安装web组件,所以全局没有bower的话必须先安装
npm install bower -g git clone https://github.com/hcnode/folder-gallerycd folder-gallerynpm installvi ./config/default.json修改配置 “homePath” 为你的相册的文件夹路径npm start- 访问 http://localhost:8000/
搬砖说明
主要材料
前端的框架是bootstrap和angular,其他核心的材料包括这些:
- express 这个大家应该都很熟,提供web服务
- serve-index express中间件,提供目录和文件浏览
- lwip 生成缩略图的工具
- tar-fs 压缩工具
- ngGallery 相册库
搬运过程
使用serve-index作为目录和文件浏览的express中间件
这个库使用很简单,只需要一行代码,再加上静态文件路由:
1
2app.use('/', serveIndex(homePath, {'icons': true, view: "details"}));
app.use('/', express.static(homePath));
因为我需要在页面上加上“打包下载”和“相册浏览”的功能,所以我fork这个库加上了2个链接:

1
2
	   <a href="#" onclick="this.href=location.href+(location.pathname=='/'?'':'/')+'_tar'" target="_blank">Tar</a>
       <a href="#" onclick="this.href=location.href+(location.pathname=='/'?'':'/')+'_gallery'" target="_blank">Gallery</a>
路由设计
新建的路由包括相册页面、缩略图接口、原图接口、压缩打包接口,因为中间件serve-index会接管文件夹和文件的映射,所以我决定,将上面的接口定义为:/path/to/file(folder)/_action,所以四个路由的定义分别为:
1
2
3
4
5
6
7
8
9
10
11
12
13
14
15
16
// 打包下载
app.get(/.*\/_tar$/, function (req, res, next) {
...
}
// 缩略图生成
app.get(/.*\/_thumb$/, function (req, res, next) {
...
}
// 相册页面
app.get(/.*\/_gallery$/, function (req, res, next) {
...
}
// 原图请求
app.get(/.*\/_image$/, function (req, res, next) {
...
}打包下载
很轻松的一块砖,使用tar-fs只需要一行代码,加上压缩包的文件名定义,一共两行:
1
2res.set("Content-Disposition", 'attachment;filename="' + encodeURIComponent(tarName) + '.tar"');
tar.pack(dir).pipe(res);缩略图生成
这块砖般得比较费劲,消耗了20多行代码,主要是加了一些逻辑,比如第一次访问生成缩略图并保存,第二次访问就会直接读取,因为生成缩略图还是比较耗资源。
1
2
3
4
5
6
7
8
9
10
11
12
13
14
15
16
17
18
19
20
21
22if(fs.existsSync(thumbFile)){
res.sendFile(thumbFile);
}else {
lwip.open(fullFile, function (err, image) {
var max = Math.max(image.width(), image.height());
if(max < thumbSize){
res.sendFile(fullFile);
}else {
var ratio = 1;
if(image.width() > image.height()){
ratio = thumbSize / image.width();
}else{
ratio = thumbSize / image.height();
}
image.scale(ratio, function (err, image) {
image.writeFile(thumbFile, function (err) {
res.sendFile(thumbFile);
});
});
}
})
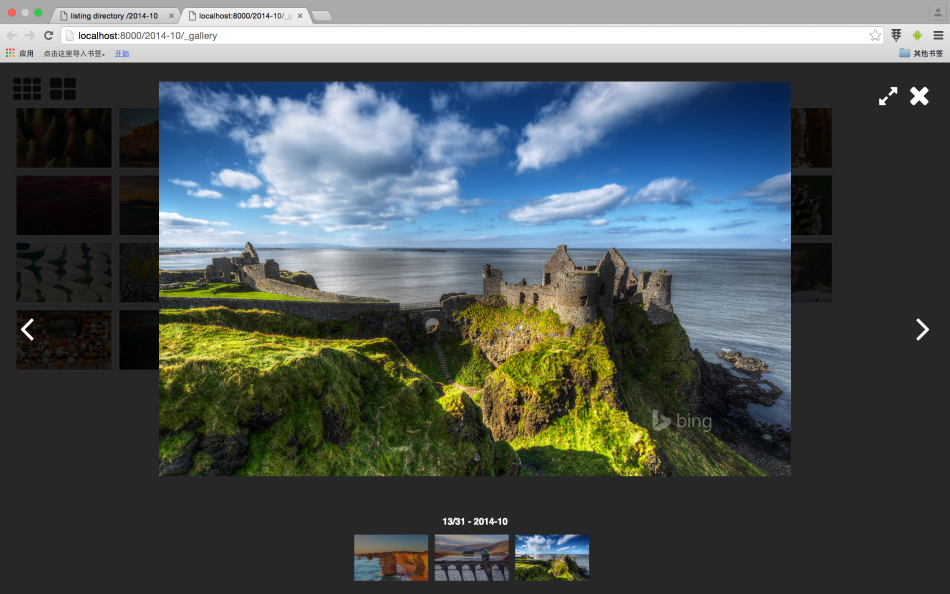
}相册页面
最大的一块砖,所以我去ngGallery找了一辆货车将它运走了
1
2
3
4
5
6
7
8
9
10
11
12
13
14
15
16
17
18
19
20
21
22
23
24
25
26
27
28
29
30
31
32
33
34<body ng-app="app" style="padding: 20px">
<div ng-controller="CtrlGallery as ctrl">
<ng-gallery images="ctrl.images" editShow="false"></ng-gallery>
</div>
<script>
function createImages(path, files){
var images = [];
for(var i=0;i<files.length;i++) {
images.push({ // ngGallery所需要的数据对象
thumb: path + "/" + files[i] + "/_thumb",
img: path + "/"+ files[i] + "/_image",
description: (/\/([^\/]+)$/.test(path) && RegExp.$1)
});
}
return images;
}
var app = angular.module("app", ['jkuri.gallery']).controller('CtrlGallery', function($scope, $timeout) {
var files = <%- JSON.stringify(files) %>; // 照片的json数组:["xxx.jpg", "yyy.jpg"]
var path = "<%- path %>";
var images = createImages(path, files);
var that = this;
// 每次加载三张图片,按顺序加载
that.images = images.splice(0, 3);
window.ngGalleryImageOnload = function (image) {
if(images.length > 0) {
$timeout(function () {
that.images.push(images.shift());
})
}
};
});
</script>配合ngGallery的路由:
1
2
3
4
5
6
7
8
9
10
11
12
13
fs.readdir(fullPath, function (err, files) {
_.forEach(files, function (file) {
if(file.indexOf(".") != 0) {
var stat = fs.statSync(fullPath + '/' + file);
if (!stat.isDirectory()) {
if (/\.(PNG)|(JPG)$/ig.test(file)) {
images.push(file);
}
}
}
});
res.render(__dirname + "/views/gallery.ejs", {files : images, path : path});
});
基本上整个相册就搭好了,并用config库封装了两个配置:homePath和thumbSize,方便用户下载后改配置。
整个搬砖过程大概就是这样,如果大家有更快的搬砖方式或者姿势,欢迎拍砖!
Issues
- ngGallery的预览模式的下面照片导航显示有时候会有点问题
- 可能有人会问为什么我使用fs文件操作喜欢用同步方式,主要是因为减少callback而已,自己内部用性能没啥影响,如果你要放到网上,那就必须用异步的接口